03 分镜图生成
1 OpenAI修改为Google Gemini
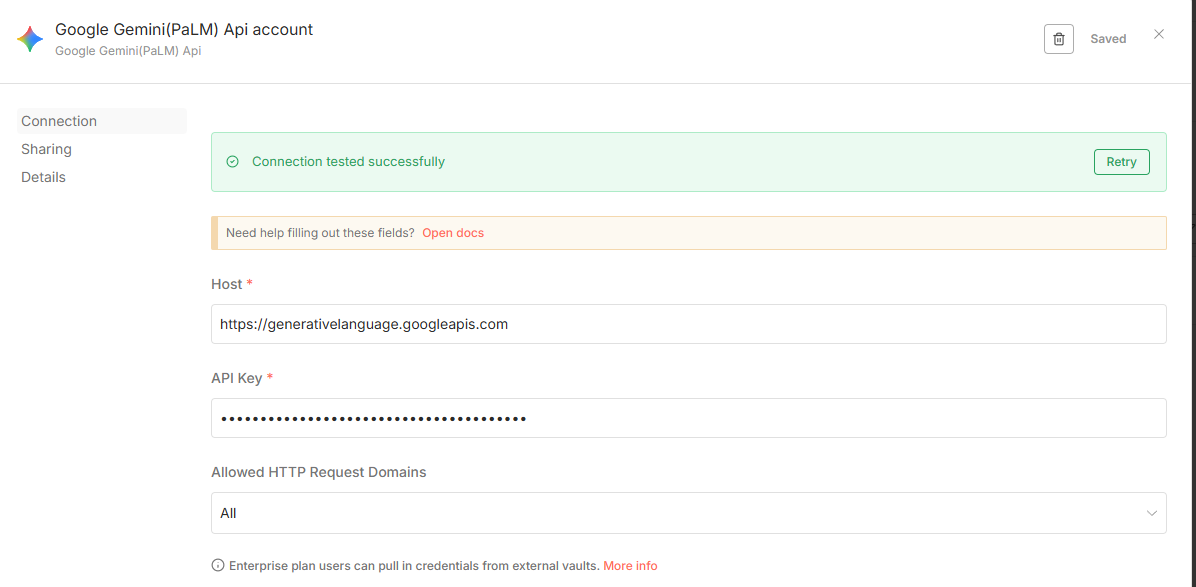
创建Gemini凭证。
- 登录n8n > 左侧菜单 > Credentials > New Credential。
- 搜索“Google Gemini” 或 “Google AI Studio (Gemini)”。
- 选择Google Gemini API 或 Google Gemini Chat Model。
- 输入你的API Key(从https://aistudio.google.com/app/apikey获取)。
- 保存,命名如“Gemini API Key”。
创建 Google OAuth 凭证(Client ID 和 Secret)
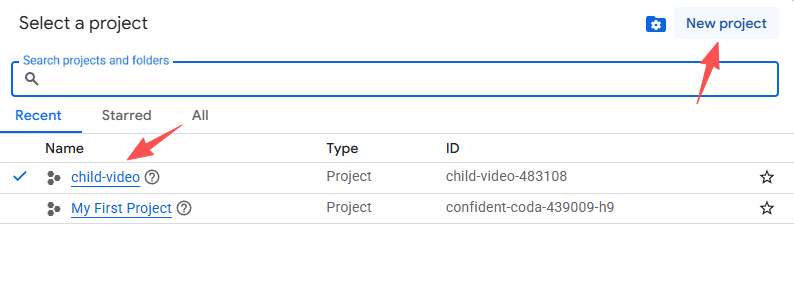
打开 Google Cloud Console:https://console.cloud.google.com/
如果是第一次用,选择或创建一个项目(Project),起名如 “child-video”。
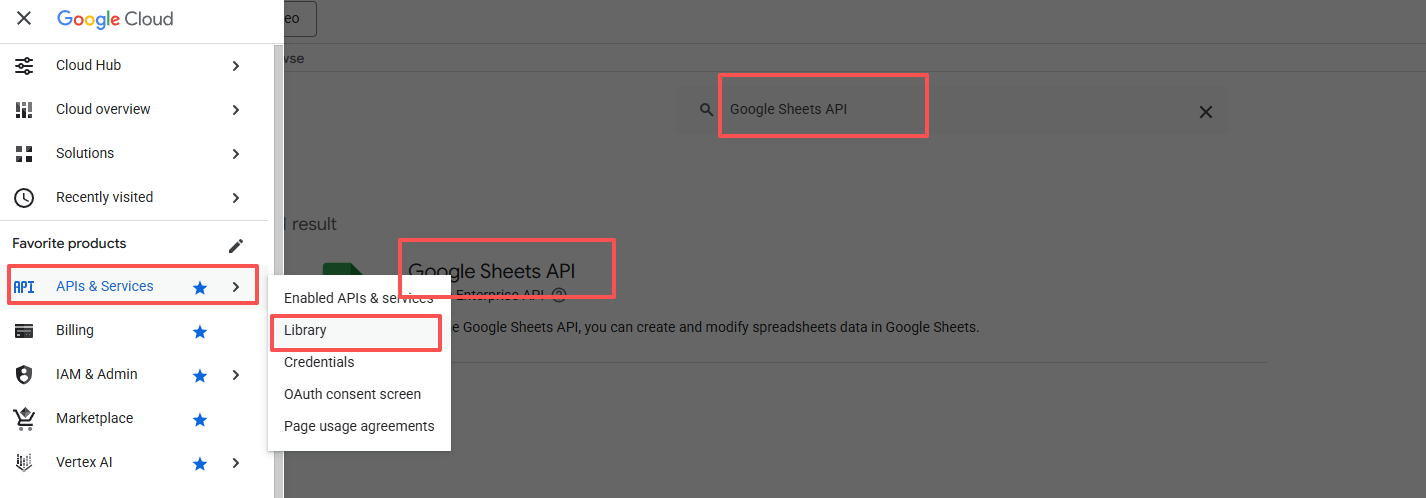
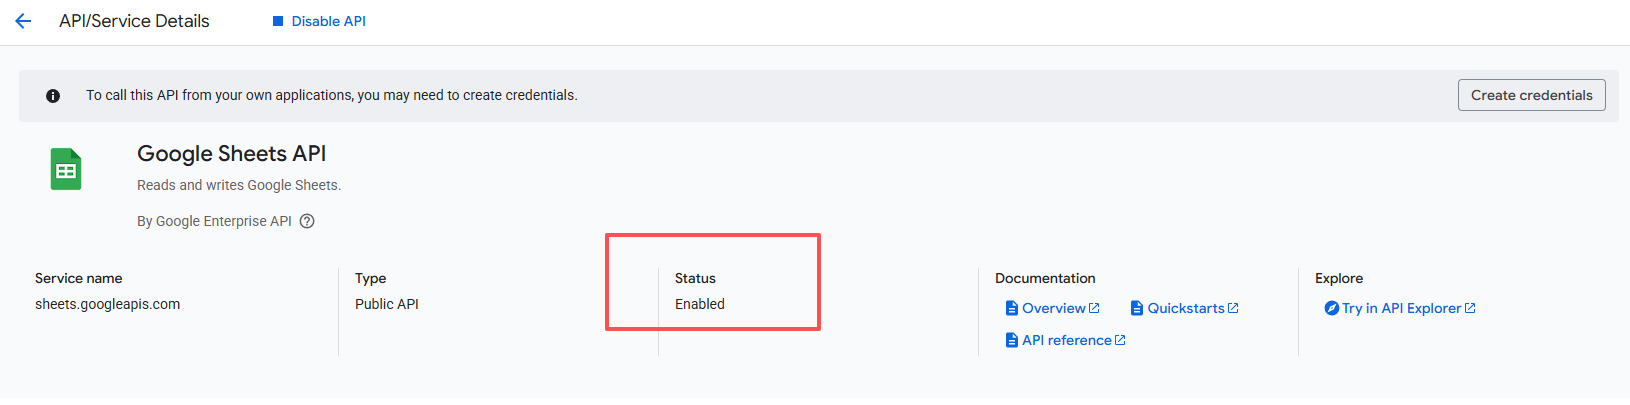
左侧菜单 > APIs & Services > Library,搜索 “Google Sheets API”,点击启用(Enable)。
再去 APIs & Services > OAuth consent screen,User Type 选 External(即使个人用也选这个),App name 填 “n8n”,其他随意填,保存。
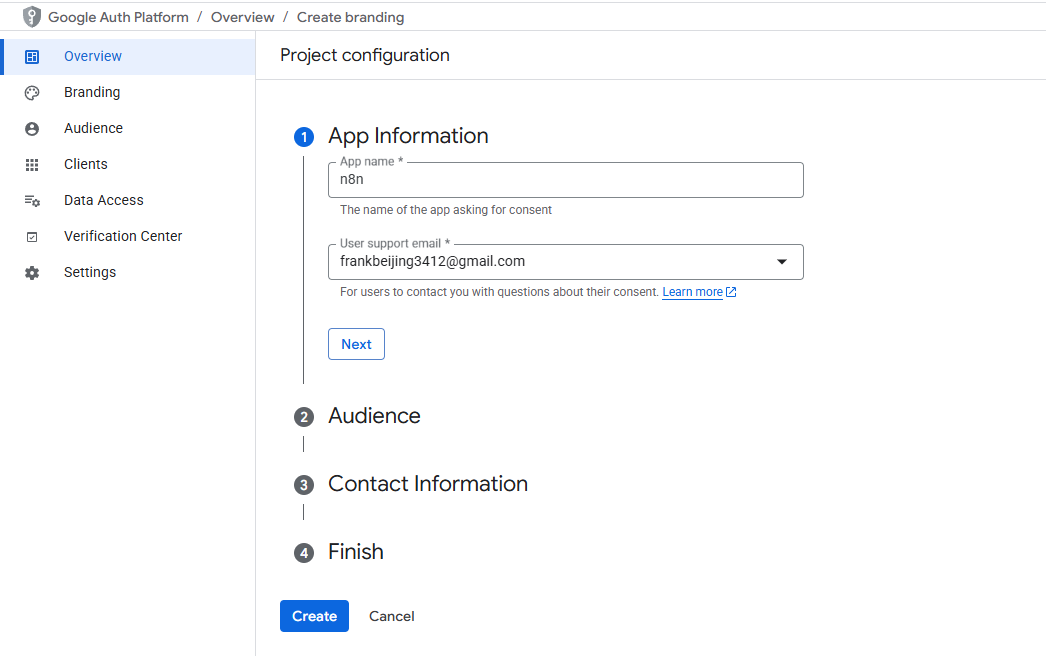
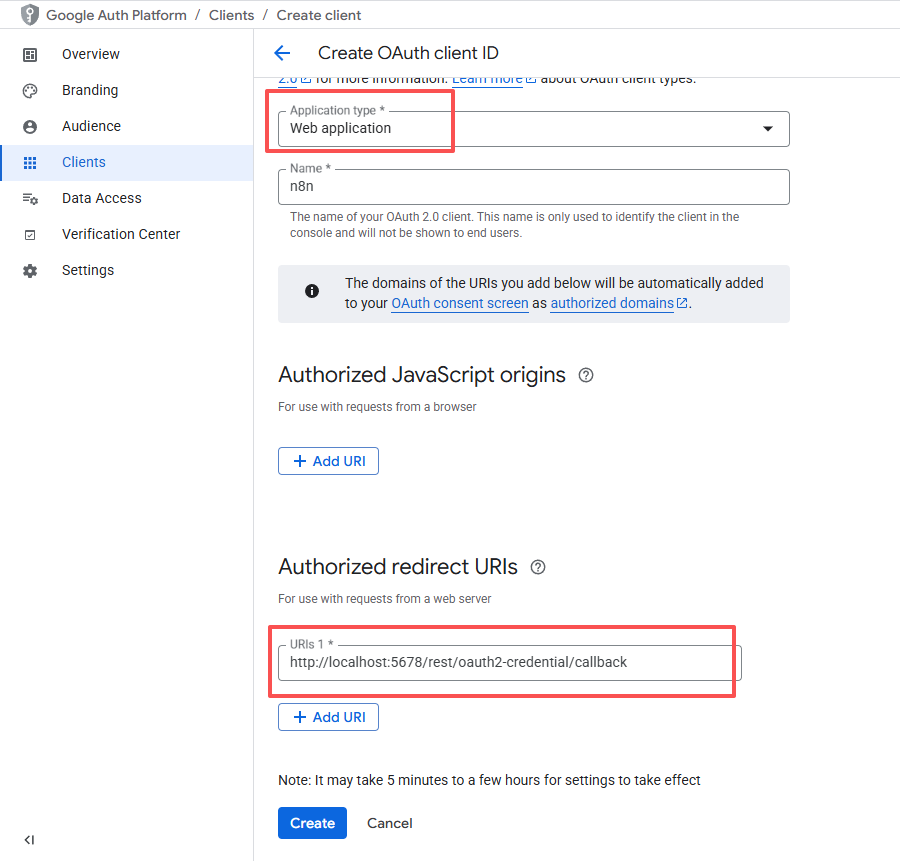
左侧 > Credentials > Create Credentials > OAuth client ID。
- Application type:Web application。
- Name:随便填。
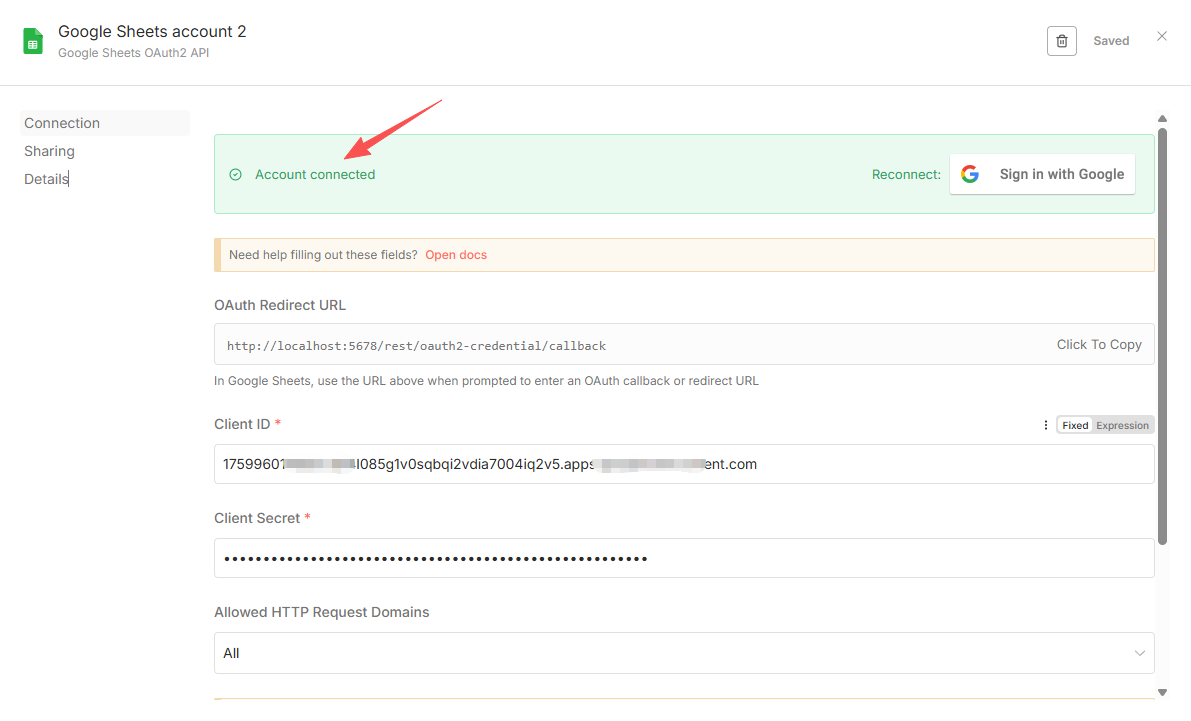
- Authorized redirect URIs:填 **http://localhost:5678/rest/oauth2-credential/callback**(n8n 本地默认这个地址)。
- 点击 Create。
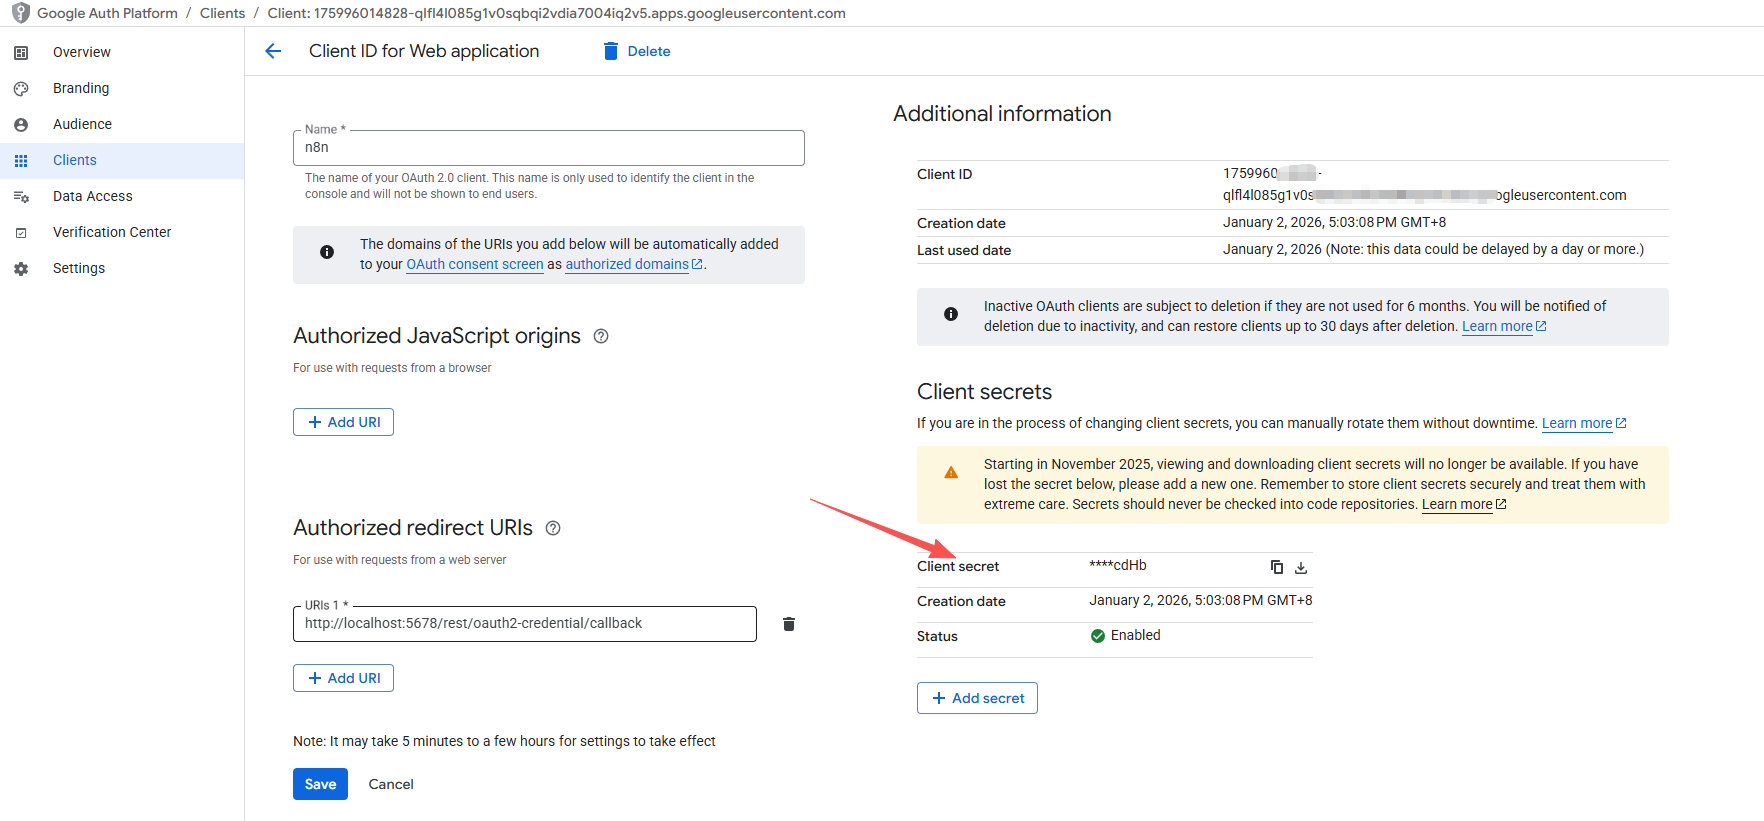
创建完成后,复制 Client ID 。

点击查看详情,找到Client Secret,记录保存。
因为我只是个人使用 n8n 访问自己的 Google Sheet,不需要发布给别人用,所以可以保持项目为 “Testing(测试中)” 模式,然后把自己加为测试用户。
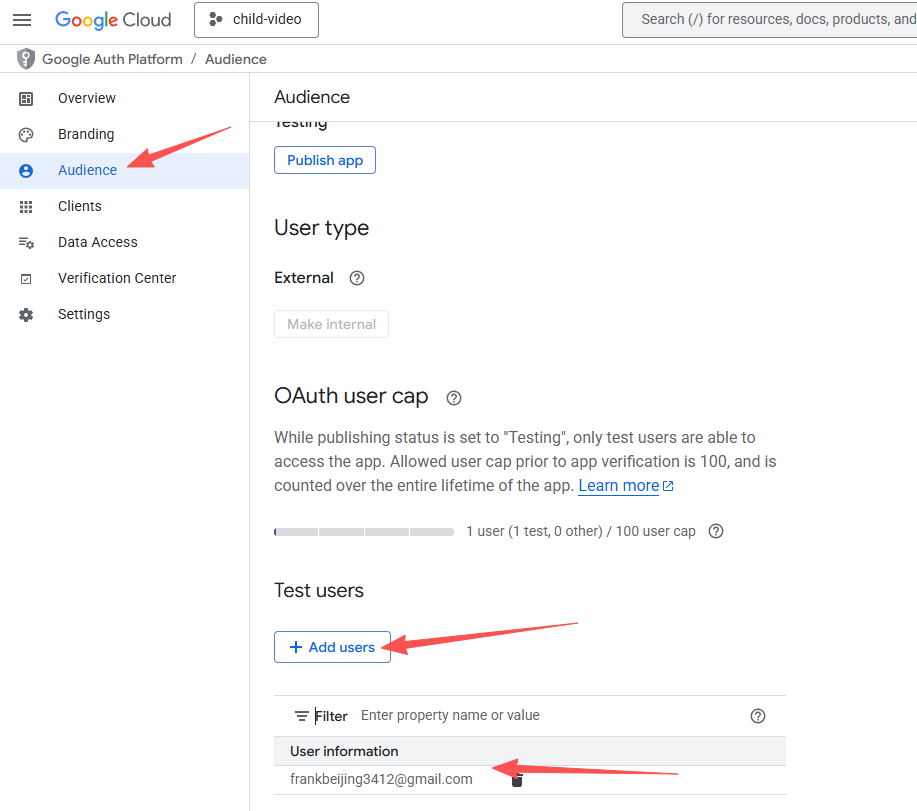
一定要添加,否则在n8n中无法验证,会提示403: access_denied。
在 n8n 中为 Google Sheets 创建认证(Credentials)
登录 n8n,打开你的工作流。 左侧菜单 > Credentials > New Credential。 在搜索框输入 “Google Sheets”,选择 Google Sheets OAuth2 API。 点击后会弹出配置窗口:
- Name:随便填,比如 “My Google Sheets”。
- Client ID 和 Client Secret:需要你自己创建一个 Google OAuth 凭证。
在 Google Sheets 节点中配置
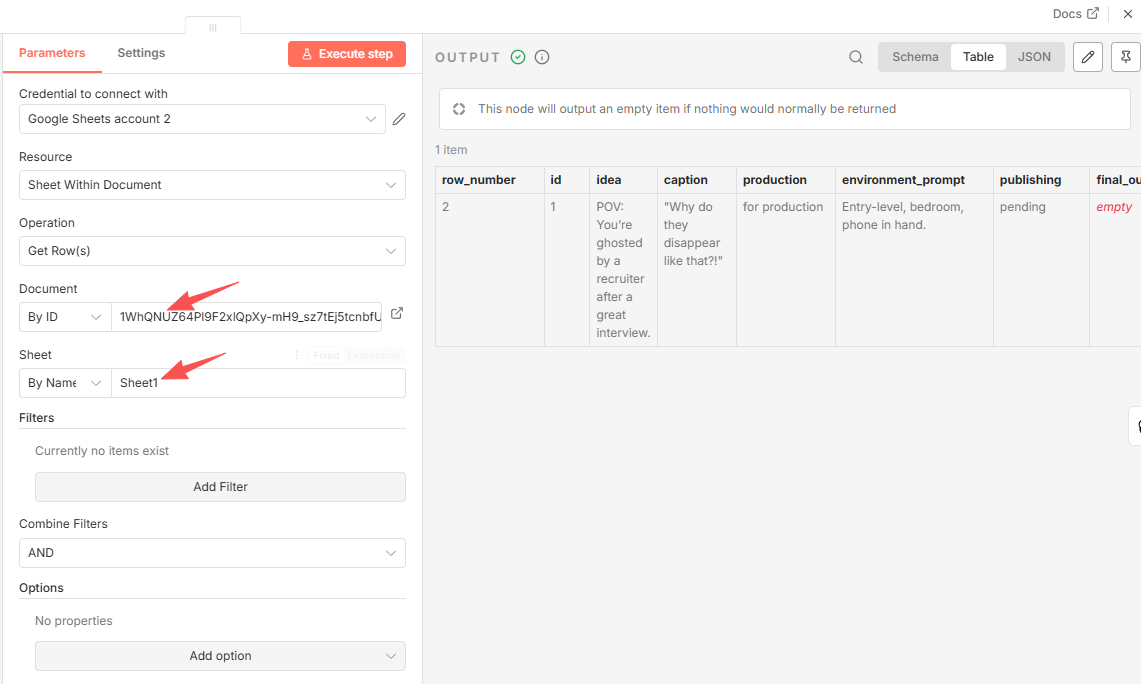
回到工作流,找到 Load Google Sheets 节点。
双击打开节点配置:
- Resource:选择“Sheet Within Document”。
- Operation:选 “Get Rows”。
- Credentials:选择你刚创建的 “Google Sheets account 2”。
- Spreadsheet ID:填复制的那个 Google Sheet 的 ID。
- 如何获取?打开表格,URL 中间那一长串就是,例如: https://docs.google.com/spreadsheets/d/1cjd8p_yx-M-3gWLEd5TargtoB35cW-3y66AOTNMQrrM/edit → Spreadsheet ID 就是 1cjd8p_yx-M-3gWLEd5TargtoB35cW-3y66AOTNMQrrM
- Sheet Name 或 Range:通常是 “Sheet1” 。
配置gemini节点
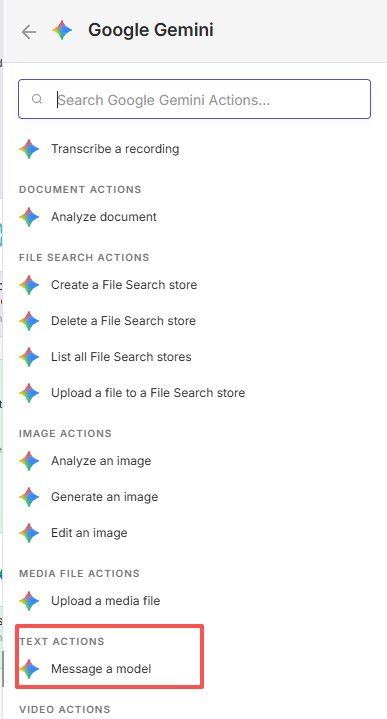
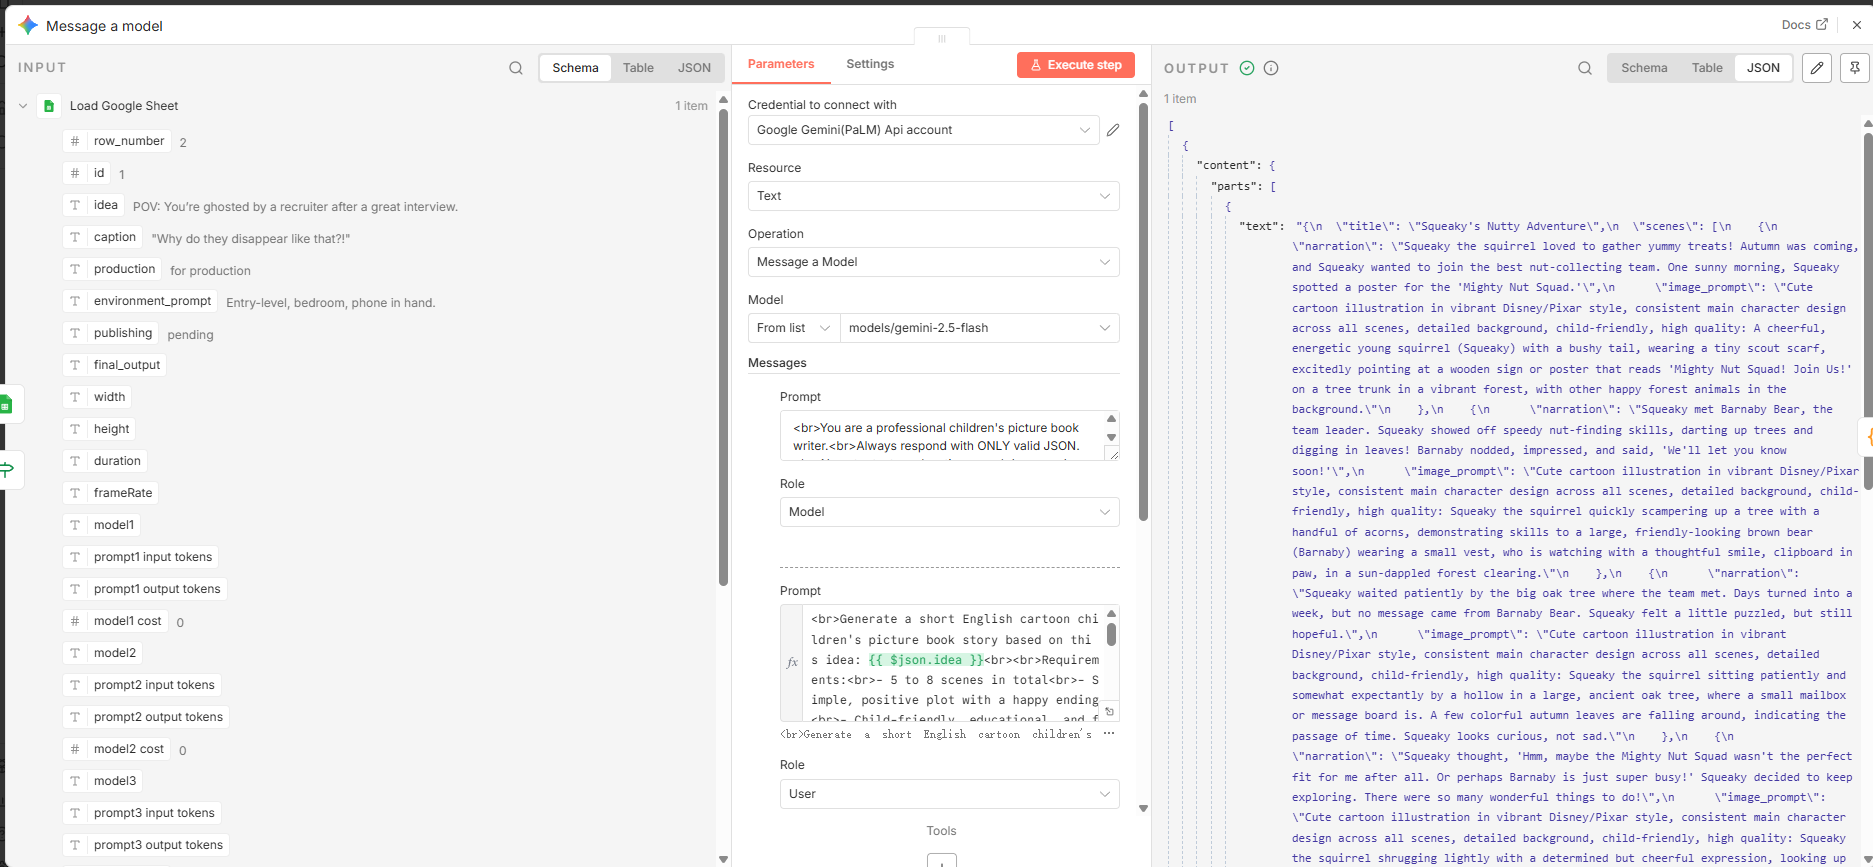
Credential:选择你之前创建的 Google Gemini API 凭证 Model:下拉选择对应的模型 System Instruction: 系统指令,非常重要!粘贴下面内容,确保 Gemini 只输出纯 JSON:
You are a professional children's picture book writer.
Always respond with ONLY valid JSON.
No extra text, explanations, markdown, code blocks, or formatting outside the JSON.
Never put the JSON inside quotation marks.
Prompt (用户消息,主提示):完整粘贴下面内容(注意 {{ $json.idea }} 会自动替换成表格里的主题)。
Generate a short English cartoon children's picture book story based on this idea: {{ $json.idea }}

Requirements:
- 5 to 8 scenes in total
- Simple, positive plot with a happy ending
- Child-friendly, educational, and fun language
- Each scene suitable for one illustration and short voiceover (10-15 seconds when spoken)

Output ONLY this exact JSON format (nothing else):

{
"title": "A short cute title",
"scenes": [
{
"narration": "Narration text for child voiceover (20-40 words)",
"image_prompt": "Cute cartoon illustration in vibrant Disney/Pixar style, consistent main character design across all scenes, detailed background, child-friendly, high quality: [vividly describe the scene]"
}
]
}
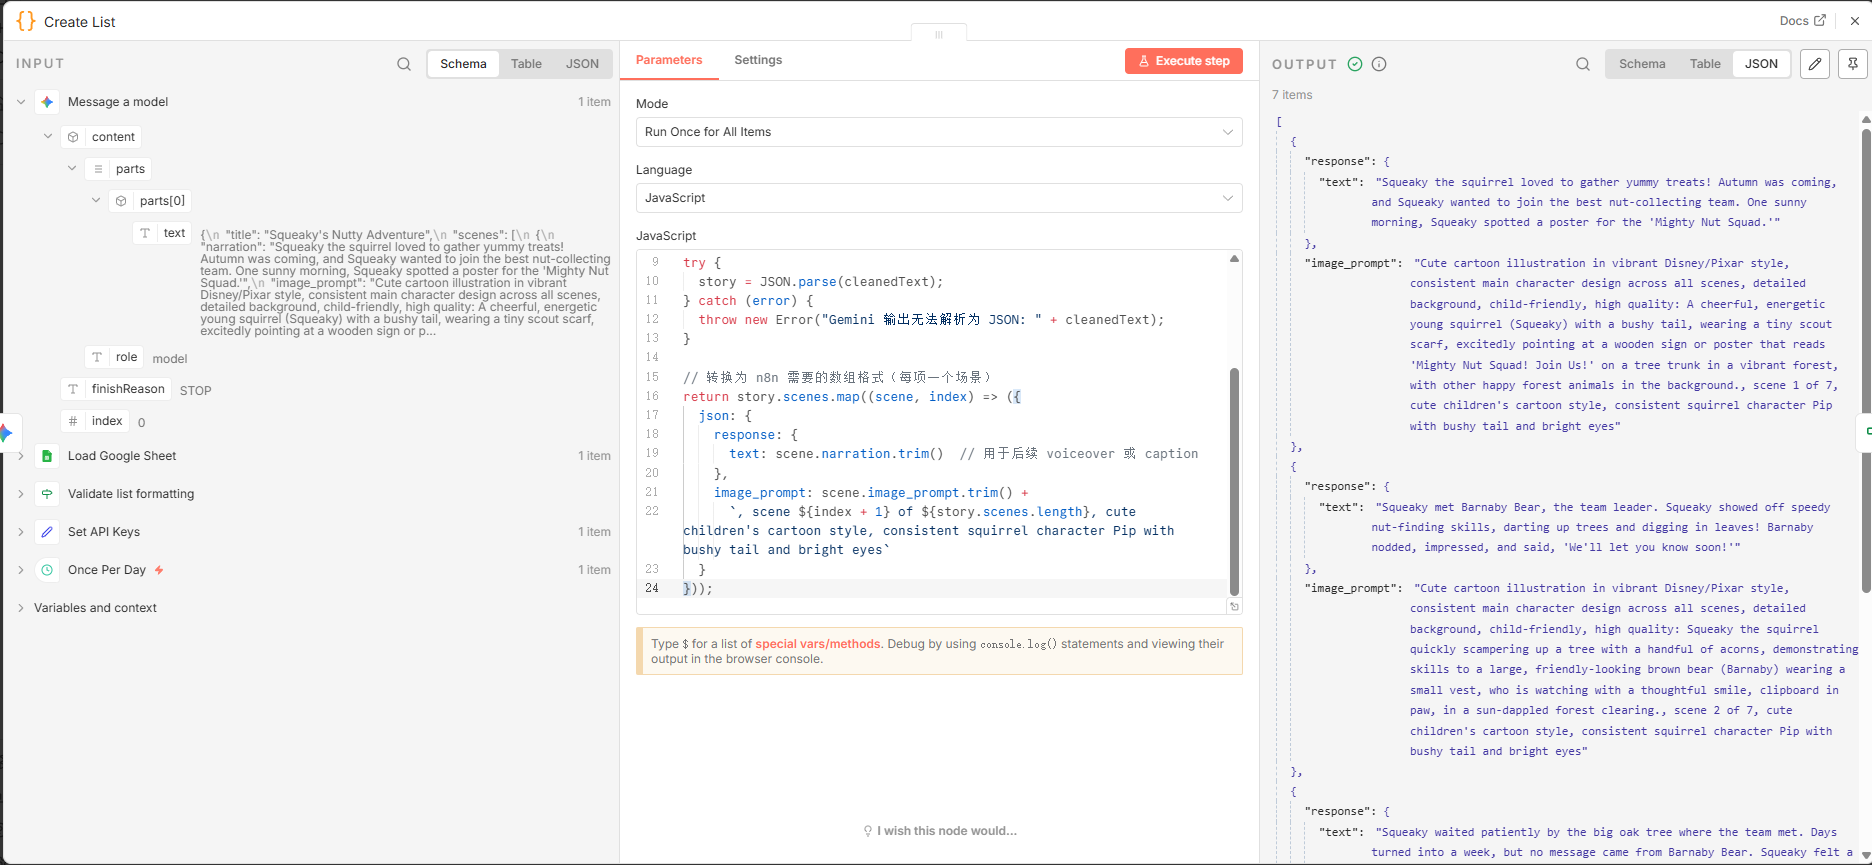
修改后面的 “Create List” Code 节点(关键!让它解析 Gemini 的 JSON)
双击 “Create List” 节点,把原来代码全部替换成下面内容:
// 获取 Message a Model 节点的输出文本
const outputText = items[0].json.text;  // 新版 Message a Model 输出路径是 .text

let story;
try {
  story = JSON.parse(outputText);
} catch (error) {
  throw new Error("Gemini 输出不是有效 JSON: " + outputText);
}

// 转换为 n8n 数组,每项一个场景(匹配模板后续流程)
return story.scenes.map((scene, index) => ({
  json: {
    response: {
      text: scene.narration.trim()  // 作为后续 caption / voiceover 文本
    },
    image_prompt: scene.image_prompt.trim() +
      `, scene ${index + 1} of ${story.scenes.length}, consistent character design, children's cartoon style`
  }
}));
03 分镜图生成
本章节将介绍如何使用 Flux 图像生成工具,根据故事内容自动生成绘本分镜图。
📋 内容概要
Flux 配置
- 配置 Flux API 访问(或本地部署)
- 设置图像生成参数
- 配置风格和尺寸要求
分镜图生成
- 根据故事场景描述生成分镜图
- 确保图像风格一致性
- 调整图像质量和细节
- 批量生成所有分镜图
图像优化
- 图像尺寸标准化
- 格式转换和优化
- 图像质量检查
- 为视频生成准备素材
🔧 技术要点
- Flux 图像生成 API
- 提示词优化技巧
- 图像批量处理
- 风格一致性控制
📝 详细内容
(待补充 Flux 的具体配置方法、API 调用示例和图像处理流程)